HVAC Preventive Maintenance Checklist Template – As a responsible HVAC system owner, you understand the importance of regular preventive maintenance to ensure the optimal performance and efficiency of your system. By following a comprehensive HVAC preventive maintenance checklist template, you can address key maintenance tasks at the right time, minimizing the risk of unexpected breakdowns and costly repairs. In this blog article, we will provide you with a detailed and unique HVAC preventive maintenance checklist template that covers all essential aspects of your system’s maintenance.
Before we delve into the checklist, it’s crucial to understand why preventive maintenance is so vital for your HVAC system. Regular maintenance not only extends the lifespan of your equipment but also improves energy efficiency, reduces energy bills, and enhances indoor air quality. By identifying and addressing potential issues before they escalate, you can avoid costly repairs and inconvenient disruptions to your comfort.


Checking and Cleaning Air Filters
Air filters play a crucial role in maintaining the efficiency and lifespan of your HVAC system. Over time, these filters accumulate dust, dirt, and debris, hampering proper airflow and straining the system. Checking and cleaning air filters regularly is essential to ensure optimal performance and prevent unnecessary strain on the system.
Importance of Air Filter Maintenance
By maintaining clean air filters, you allow for proper airflow, which enables the system to function efficiently. When air filters become clogged, the system has to work harder to draw in air, leading to increased energy consumption and unnecessary wear and tear on components. Regularly cleaning or replacing air filters not only improves energy efficiency but also helps maintain good indoor air quality by capturing airborne particles such as dust, pollen, and pet dander.
How to Check and Clean Air Filters
To check your air filters, locate the filter compartment, which is typically found near the return air duct or the blower unit. Remove the filter and inspect it for dirt, debris, and damage. If the filter is dirty, it’s time to clean or replace it.
If your filter is washable, gently rinse it with water and mild detergent. Allow it to dry completely before reinstalling. For disposable filters, replace them with a new one of the same size and type.
Remember to follow the manufacturer’s guidelines regarding filter replacement frequency, as it may vary depending on factors such as the type of filter, indoor air quality, and usage patterns.
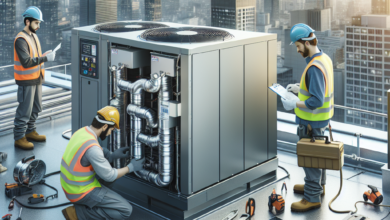
Inspecting and Cleaning Condenser Coils
Condenser coils are located in the outdoor unit of your HVAC system and are responsible for dissipating heat. Over time, these coils can accumulate dirt, debris, and even mold, impairing their ability to transfer heat efficiently. Regular inspection and cleaning of condenser coils are crucial to maintain optimal system performance and prevent potential issues.
Importance of Condenser Coil Maintenance
Dirty condenser coils can significantly impact the efficiency of your HVAC system. When the coils are coated with dirt and debris, they are unable to release heat effectively, forcing the system to work harder to achieve the desired cooling effect. This additional strain not only increases energy consumption but also puts unnecessary stress on other components, potentially leading to premature system failure.
How to Inspect and Clean Condenser Coils
To inspect the condenser coils, start by turning off the power to the outdoor unit. Remove any debris or vegetation that may have accumulated around the unit, obstructing airflow.
Next, visually inspect the coils for dirt, dust, and signs of damage. If you notice significant dirt buildup or mold growth, it’s time to clean the coils. Start by using a soft brush or a vacuum cleaner with a brush attachment to remove loose debris from the coils.
For more thorough cleaning, consider using a coil cleaner specifically designed for HVAC systems. Follow the manufacturer’s instructions and ensure that the cleaner is compatible with your system. Apply the coil cleaner to the coils, allowing it to penetrate and dissolve any stubborn dirt or debris. Rinse the coils thoroughly with water, ensuring that no cleaner residue remains.
Remember to exercise caution while cleaning the coils, as they are delicate and can be easily damaged. If you are unsure or uncomfortable performing this task, it’s best to seek professional assistance.
Lubricating Moving Parts
The smooth operation of moving parts such as motors, fans, and bearings is vital for optimal HVAC system performance. Lubricating these components regularly reduces friction, minimizes noise, and prolongs the lifespan of the equipment.
Importance of Lubrication
Proper lubrication ensures that moving parts operate smoothly and efficiently, reducing the risk of wear and tear. When components are not adequately lubricated, friction increases, leading to increased energy consumption and potentially damaging the equipment. Regular lubrication helps maintain optimum performance, reduces energy costs, and prevents premature component failure.
How to Lubricate Moving Parts
Before lubricating any moving parts, ensure that the power to the system is turned off. Locate the lubrication points on your HVAC system, which are typically marked with oil ports or caps. Refer to your system’s manual or consult a professional if you are unsure about the lubrication points.
Using a lubricant recommended by the manufacturer, apply a small amount of lubricant to each designated point. Be careful not to over-lubricate, as excess lubrication can attract dirt and debris, potentially causing damage. Once the lubrication is complete, turn the power back on and allow the system to run for a few minutes to distribute the lubricant evenly.
It’s important to note that not all components of an HVAC system require lubrication. Refer to your system’s manual or consult a professional to determine which parts require lubrication and the appropriate lubricant to use.
Testing Thermostat Functionality
The thermostat serves as the control center for your HVAC system, allowing you to set and maintain the desired temperature in your home or building. Regularly testing and calibrating your thermostat ensures accurate temperature control, energy savings, and overall system efficiency.
Importance of Thermostat Functionality
A properly functioning thermostat is key to maintaining a comfortable indoor environment while optimizing energy usage. If your thermostat is not calibrated correctly or malfunctions, it can lead to temperature inconsistencies, energy wastage, and unnecessary strain on your HVAC system. Regular testing and calibration help ensure that your thermostat accurately reflects the desired temperature, promoting energy efficiency and reducing utility costs.
How to Test Thermostat Functionality
Start by setting your thermostat to a specific temperature and observe if the HVAC system responds accordingly. Ensure that the system turns on and off as expected to maintain the desired temperature. If you notice any inconsistencies or delays, it may indicate a problem with your thermostat.
To calibrate your thermostat, consult the manufacturer’s instructions or refer to the user manual. Many modern thermostats have built-in calibration features that allow you to adjust the displayed temperature to match the actual temperature accurately. Follow the calibration instructions provided and verify the accuracy of the thermostat using a separate thermometer if necessary.
If you suspect a malfunctioning thermostat or are unsure about the testing and calibration process, it’s best to consult a professional HVAC technician for assistance.
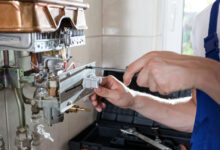
Checking Electrical Connections
Electrical connections within your HVAC system are critical for the safe and efficient operation of the equipment. Regularly inspecting these connections for loose or damaged wires helps prevent potential hazards, including electrical shorts, system malfunctions, and even fires.
Importance of Electrical Connection Maintenance
Loose or damaged electrical connections can lead to system inefficiencies and pose a significant safety risk. When connections become loose, they can cause interruptions in the electrical flow, leading to malfunctions and potential damage to the HVAC system. Additionally, loose connections generate heat, which can melt insulation and increase the risk of electrical fires. Regular inspection and maintenance of electrical connections help ensure the safe and reliable operation of your HVAC system.
How to Check Electrical Connections
Before inspecting electrical connections, ensure that the power to the HVAC system is turned off. This step is essential to eliminate the risk of electric shock or injury.
Visually inspect all electrical connections, looking for signs of loose or damaged wires. Loose connections may exhibit visible gaps or signs of burning around the connection points. Additionally, check for frayed or damaged insulation, which can expose wires to potential hazards.
If you notice any loose or damaged connections, it’s important to address them promptly. Tighten any loose connections using the appropriate tools, ensuring that they are secure but not overtightened. If you encounter damaged wires or insulation, it’s best to consult a professional HVAC technician to handle the repairs safely.
Inspecting and Cleaning Ductwork
The ductwork in your HVAC system is responsible for distributing conditioned air throughout your home or building. Regular inspection and cleaning of the ductwork help ensure proper airflow, improve indoor air quality, and maintain system efficiency.
Importance of Ductwork Inspection and Cleaning
Over time, ductwork can accumulate dust, debris, mold, and other contaminants. This buildup restricts airflow, reducing the efficiency of your HVAC system and potentially compromising indoor air quality. Additionally, leaks or damaged ducts can lead to wasted energy and uneven distribution of conditioned air. Regular inspection and cleaning of the ductwork help maintain optimal system performance, improveindoor air quality, and prevent potential issues associated with dirty or damaged ducts.
How to Inspect and Clean Ductwork
To inspect your ductwork, start by visually examining accessible sections of the ducts for signs of dirt, dust, or mold. Look for any visible leaks or damage, such as disconnected joints or holes. Pay attention to areas near vents, as they are more prone to dirt buildup.
If you suspect significant dirt or mold growth, it’s best to hire a professional duct cleaning service. They have the necessary equipment, such as high-powered vacuums and specialized brushes, to thoroughly clean the ductwork and remove accumulated debris. Professional duct cleaning can help improve indoor air quality and system efficiency.
However, if you choose to clean the ducts yourself, start by turning off the HVAC system. Remove vent covers or grilles and use a vacuum cleaner with a brush attachment to remove dust and debris from the vents. You can also use a damp cloth or microfiber cloth to wipe down the vent covers for a more thorough cleaning.
For ducts that are accessible, consider using a duct cleaning brush to dislodge any stubborn dirt or debris. You can attach the brush to a flexible rod or pole to reach deeper into the ducts. Once you have completed the cleaning process, reinstall the vent covers or grilles and turn the HVAC system back on.
Note that if you encounter extensive mold growth or suspect asbestos-containing materials in your ductwork, it’s crucial to consult a professional for proper remediation and handling.
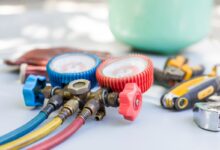
Verifying Refrigerant Levels and Detecting Leaks
The refrigerant in your HVAC system is responsible for absorbing and releasing heat, facilitating the cooling process. Ensuring proper refrigerant levels and detecting any leaks is essential for maintaining optimal cooling performance and preventing potential damage to the system.
Importance of Verifying Refrigerant Levels and Detecting Leaks
Refrigerant is a vital component of your HVAC system, and insufficient levels or leaks can significantly impact its cooling efficiency. When refrigerant levels are low, the system has to work harder to achieve the desired cooling effect, leading to increased energy consumption and potential damage to the compressor. Additionally, refrigerant leaks can result in reduced cooling capacity and even system failure if left unaddressed. Regularly verifying refrigerant levels and detecting leaks helps ensure that your system operates at peak performance and avoids costly repairs.
How to Verify Refrigerant Levels and Detect Leaks
Checking refrigerant levels and detecting leaks should be performed by a qualified HVAC technician. They have the necessary tools and expertise to handle refrigerants safely and accurately assess the system’s condition.
The technician will start by connecting a pressure gauge to the system to measure the refrigerant levels. If the levels are low, they will need to determine the cause, which could be a leak or improper charging during installation. In either case, the technician will need to address the issue by repairing the leak or adding refrigerant to the system following industry guidelines.
To detect refrigerant leaks, technicians may use various methods such as an electronic leak detector, ultraviolet dye, or a refrigerant leak detection system. These tools help pinpoint the location of the leak, allowing for prompt repairs. It’s important to note that refrigerant leaks should never be ignored, as they can lead to system damage and environmental harm.
Testing Safety Controls
Safety controls in your HVAC system are designed to protect against potential hazards, such as overheating or system malfunctions. Regularly testing these safety controls helps ensure that they are functioning correctly and providing the necessary protection for your system and occupants.
Importance of Testing Safety Controls
Safety controls are essential for the safe operation of your HVAC system and the protection of your property and occupants. These controls monitor various aspects of the system, such as temperature, pressure, and airflow, and trigger appropriate actions to prevent potential hazards. Regular testing ensures that these controls are in working order, providing you with peace of mind and reducing the risk of system failures or dangerous situations.
How to Test Safety Controls
Testing safety controls should be performed by a qualified HVAC technician. They have the knowledge and experience to understand the specific safety controls in your system and perform the necessary tests.
The technician will start by reviewing the system’s documentation or consulting the manufacturer’s guidelines to understand the specific safety controls present. They will then conduct a series of tests to ensure that each control is functioning as intended.
For example, they may test the high limit switch, which shuts off the system if the temperature exceeds a safe limit. Additionally, they may test pressure switches, airflow switches, and other safety devices to verify their operation. Any malfunctioning safety controls should be repaired or replaced promptly to maintain the system’s safety and efficiency.
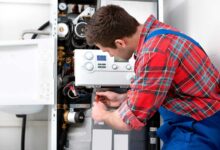
Evaluating Blower Motor Performance
The blower motor in your HVAC system is responsible for circulating air throughout your home or building. Regularly evaluating its performance helps ensure efficient air circulation, proper airflow, and overall system functionality.
Importance of Blower Motor Evaluation
The blower motor plays a crucial role in maintaining proper airflow and ensuring consistent temperatures throughout your space. When the blower motor is not functioning optimally, it can lead to reduced airflow, uneven heating or cooling, and increased energy consumption. Regular evaluation and maintenance of the blower motor help identify any issues and ensure that it operates at peak performance.
How to Evaluate Blower Motor Performance
Evaluating blower motor performance requires a combination of visual inspection and functional testing. Start by visually examining the blower motor for any visible signs of damage, such as worn belts or loose connections. Ensure that the blower wheel is clean and free from debris.
Next, turn on your HVAC system and observe the blower motor’s operation. Pay attention to the strength and consistency of the airflow. If you notice weak airflow or unusual noises coming from the blower motor, it may indicate a problem that requires further investigation and potential repairs.
If you are unsure about the evaluation process or encounter any issues, it’s recommended to consult a professional HVAC technician for a thorough assessment and necessary repairs.
Cleaning and Inspecting Indoor and Outdoor Units
Regular cleaning and inspection of both the indoor and outdoor units of your HVAC system are essential for maintaining optimal performance, preventing dirt buildup, and identifying potential issues.
Importance of Cleaning and Inspecting Units
Both the indoor and outdoor units of your HVAC system are exposed to various environmental factors, such as dust, dirt, and debris. Over time, this buildup can hinder airflow, reduce system efficiency, and potentially cause damage to the components. Regular cleaning and inspection help ensure that both units are free from dirt and debris, allowing for optimal performance and preventing potential issues.
How to Clean and Inspect Units
Cleaning and inspecting the indoor and outdoor units require different approaches.
For the indoor unit, start by turning off the power to the system. Remove the access panels to gain access to the interior components. Use a soft brush or a vacuum cleaner with a brush attachment to gently remove dust and debris from the coils, fan blades, and other accessible parts. Take care not to bend or damage the delicate fins on the coils. If necessary, use a mild detergent and water solution to clean stubborn dirt or grime. Once the cleaning is complete, reinstall the access panels and turn the power back on.
For the outdoor unit, begin by turning off the power and clearing any debris or vegetation that may have accumulated around the unit. Use a garden hose to gently spray the exterior of the unit, removing dirt and dust. Take care not to use excessive pressure, as it may damage the fins or other components. If you encounter stubborn dirt or debris, consider using a coil cleaner specifically designed for outdoor units. Follow the manufacturer’s instructions and rinse thoroughly with water to remove any residue. Once the cleaning is complete, allow the unit to dry completely and turn the power back on.
Regularly inspect both units for any signs of damage, such as loose or damaged wires, leaks, or worn-out components. If you notice any issues, it’s best to consult a professional HVAC technician for further evaluation and necessary repairs.
In conclusion, following this comprehensive HVAC preventive maintenance checklist template is crucial for ensuring the optimal performance, efficiency, and longevity of your system. Regular maintenance not only helps you avoid unexpected breakdowns but also saves you money in the long run by maximizing energy efficiency and minimizing repair costs. By checking and cleaning air filters, inspecting and cleaning condenser coils, lubricating moving parts, testing thermostat functionality, checking electrical connections, inspecting and cleaning ductwork, verifying refrigerant levels and detecting leaks, testing safety controls, evaluating blower motor performance, and cleaning and inspecting indoor and outdoor units, you can keep your HVAC system in top shape. Make preventive maintenance a priority, and enjoy the benefits of a well-maintained HVAC system.