Understanding the Importance of Heater Maintenance for Optimal Performance
What is Maintenance of a Heater – In today’s fast-paced world, where the comfort of our homes is paramount, a well-functioning heater is essential. However, many homeowners tend to neglect the maintenance of their heaters, leading to reduced efficiency, higher energy bills, and even potential safety hazards. In this article, we will explore what heater maintenance entails, why it is crucial, and how you can ensure your heating system performs optimally for years to come.
Regular maintenance of your heater not only ensures a comfortable living environment but also helps you save money in the long run. By identifying and addressing potential issues early on, you can prevent costly repairs or even the need for a complete replacement. Moreover, a well-maintained heater operates more efficiently, reducing energy consumption and minimizing your carbon footprint.


Cleaning and Inspection
Regular cleaning and inspection of your heater are essential to ensure its smooth operation and longevity. Over time, dust, debris, and other contaminants can accumulate inside your heater, obstructing airflow and reducing its efficiency. By following these simple steps, you can keep your heater clean and functioning optimally.
Gather the Necessary Tools
Before you begin cleaning your heater, gather the necessary tools to make the process easier and more efficient. You will need a soft cloth or brush, a vacuum cleaner with a brush attachment, and a screwdriver (if required for accessing certain parts of your heater).
Turn Off the Power
Prior to cleaning your heater, it is crucial to turn off the power supply. Locate the power switch or circuit breaker that controls your heating system and switch it off to prevent any accidents or electrical shocks while cleaning.
Remove Dust and Debris
Start by removing any visible dust or debris from the exterior of your heater. Use a soft cloth or brush to gently wipe down the surface. Be careful not to apply excessive pressure or use abrasive materials that could damage the unit.
Access Internal Components
To access the internal components of your heater, you may need to remove a panel or grille. Refer to your heater’s user manual or consult a professional if you are unsure about the process. Once the necessary access is gained, proceed to the next step.
Vacuum the Interior
Using a vacuum cleaner with a brush attachment, carefully clean the interior of your heater. Pay close attention to the blower assembly, heat exchanger, and other critical components. Remove any accumulated dust or debris, ensuring proper airflow and preventing potential issues.
Inspect for Warning Signs
While cleaning your heater, be on the lookout for any warning signs of potential problems. These may include unusual noises, loose or damaged components, or signs of corrosion. If you notice anything out of the ordinary, it is advisable to consult a professional for further inspection and necessary repairs.
Checking and Replacing Filters
Filters play a vital role in maintaining the air quality within your home and prolonging the lifespan of your heater. Over time, filters can become clogged with dirt, dust, and other airborne particles, obstructing airflow and reducing your heater’s efficiency. Follow these steps to ensure your filters are clean and functioning optimally.
Determine Filter Type
There are various types of filters used in heaters, including disposable fiberglass filters, pleated filters, and electrostatic filters. It is essential to identify the type of filter used in your heater before proceeding with the cleaning or replacement process.
Check Filter Condition
Inspect your filter for any signs of dirt, dust, or damage. Hold it up to the light to see if light passes through easily or if it appears clogged. If it is excessively dirty or damaged, it is time for a replacement.
Clean or Replace the Filter
If your filter is washable, carefully follow the manufacturer’s instructions to clean it. Typically, this involves rinsing the filter under running water and allowing it to dry completely before reinstalling it. If your filter is disposable, remove it and replace it with a new one of the same size and type.
Set a Filter Replacement Schedule
To ensure your heater always operates efficiently, it is important to establish a regular filter replacement schedule. The frequency of filter changes depends on factors such as the type of filter, the level of indoor air pollution, and the manufacturer’s recommendations. Generally, it is recommended to replace disposable filters every 1-3 months and clean washable filters every 1-2 months.
Lubrication of Moving Parts
A well-lubricated heating system ensures smooth operation, prevents unnecessary wear and tear, and extends the lifespan of your heater. Over time, the moving parts of your heater can become dry or develop friction, leading to increased energy consumption and potential malfunctions. By following these steps, you can ensure proper lubrication of your heater’s moving parts.
Identify Moving Parts
Before you begin lubricating your heater, it is essential to identify the moving parts that require lubrication. These may include fan motors, bearings, pulleys, and other components that experience friction during operation. Refer to your heater’s user manual or consult a professional if you are unsure about the specific parts that require lubrication.
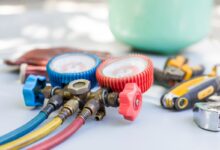
Choose the Right Lubricant
Selecting the appropriate lubricant is crucial to ensure optimal performance and prevent damage to your heater. Consult your heater’s user manual or contact the manufacturer to determine the recommended type of lubricant for your specific model. Generally, non-detergent motor oil or specific lubricants designed for HVAC systems are suitable for heater maintenance.
Power Off the Heater
Before you begin lubricating the moving parts, make sure to turn off the power supply to your heater. This precautionary measure ensures your safety and prevents any accidental activation of the heater during the maintenance process.
Apply Lubricant
Using a small amount of lubricant, apply it to the designated moving parts according to the manufacturer’s instructions. Be careful not to over-lubricate, as excessive lubrication can attract dust and debris, leading to potential issues. Ensure that the lubricant is evenly distributed and covers all necessary surfaces.
Check for Excessive Friction
After applying the lubricant, manually rotate the moving parts to ensure smooth movement and identify any signs of excessive friction. If you notice any resistance or unusual noises, consult a professional for further inspection, as it may indicate underlying issues that require attention.
Testing and Calibrating Thermostat
Accurate temperature control is crucial for maintaining a comfortable indoor environment and avoiding energy wastage. Over time, thermostats can lose their calibration, resulting in inaccurate temperature readings and inefficient operation of your heating system. Follow these steps to test and calibrate your thermostat for optimal performance.
Inspect the Thermostat
Begin by visually inspecting your thermostat for any signs of damage or loose wiring. Ensure that the thermostat is securely mounted on the wall and that all connections are intact. If you notice any issues, it is advisable to consult a professional for repairs or replacement.
Test Temperature Accuracy
Place a thermometer near your thermostat and compare the reading with the temperature displayed on the thermostat. If there is a significant difference between the two readings, your thermostat may require calibration or replacement. Consult your thermostat’s user manual or contact the manufacturer for specific instructions on calibrating your model.
Adjust Thermostat Calibration
If your thermostat allows calibration, follow the manufacturer’s instructions to make the necessary adjustments. Typically, this involves accessing the thermostat’s internal settings and adjusting the calibration offset to align the displayed temperature with the actual room temperature. Be cautious when making these adjustments, as incorrect calibration can lead to further inaccuracies.
Test Temperature Response
After calibrating your thermostat, test its temperature response to ensure it accurately reflects changes in the room’s temperature. Adjust the set temperature on the thermostat and monitor how quickly the heating system responds. If there is a significant delay or the system fails to reach the desired temperature, it may indicate underlying issues that require professional attention.
Inspecting and Cleaning Vents and Ducts
Clean vents and ducts are essential for maintaining good indoor air quality and preventing blockages that can hinder the performance of your heating system. Over time, dust, dirt, and debris can accumulate in vents and ducts, reducing airflow, and potentially circulating allergens or pollutants throughout your home. Follow these steps to inspect and clean your vents and ducts effectively.
Visual Inspection
Start by visually inspecting your vents and ducts for any signs of dust, debris, or blockages. Use a flashlight to illuminate the interior of the vents and check for any visible accumulation. If you notice significant dirt or blockages, it is advisable to proceed with a thorough cleaning.
Turn Off the System
Prior to cleaning your vents and ducts, turn off your heating system to ensure your safety and prevent any potential damage. Locate the power switch or circuit breaker that controls your heating system and switch it off.
Remove Vent Covers
To access the interior of your vents andducts, you will need to remove the vent covers. Depending on the type of vent covers you have, this may involve unscrewing them or simply lifting them off. Be careful when removing the covers to avoid damaging them or the surrounding area.
Vacuum the Vents
Using a vacuum cleaner with a brush attachment, carefully vacuum the interior of the vents to remove any dust or debris. Start from the main duct opening and work your way towards the individual vents, ensuring thorough cleaning. Pay special attention to any areas where you notice significant accumulation or blockages.
Clean the Vent Covers
While the vent covers are removed, take the opportunity to clean them as well. Wipe them down with a damp cloth or use a mild cleaning solution if necessary. Ensure that the vent covers are completely dry before reinstalling them to prevent moisture buildup within the vents.
Consider Professional Duct Cleaning
If you notice excessive dust or debris in your ducts, or if you have not had them professionally cleaned in a long time, it may be beneficial to hire a professional duct cleaning service. Professional duct cleaning involves using specialized equipment to thoroughly clean the ductwork, ensuring optimal airflow and improved indoor air quality.
Maintain Regular Cleaning Schedule
To prevent the accumulation of dust and debris in your vents and ducts, it is important to establish a regular cleaning schedule. The frequency of cleaning depends on factors such as the level of indoor air pollution and the presence of pets or allergies. Generally, it is recommended to clean vents and ducts at least once every 2-3 years, or more frequently if necessary.
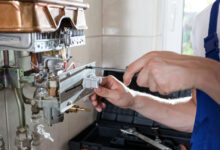
Checking Electrical Connections
Electrical connections are critical for the safe and efficient operation of your heater. Over time, these connections can loosen or become corroded, leading to malfunctions or even electrical hazards. By regularly checking and maintaining the electrical connections in your heater, you can ensure its optimal performance and safety.
Turn Off the Power
Before inspecting or working on any electrical connections, it is essential to turn off the power supply to your heater. Locate the power switch or circuit breaker that controls your heating system and switch it off. This step is crucial to prevent any electrical shocks or accidents.
Visually Inspect Connections
Carefully inspect the electrical connections within your heater for any signs of damage, loose wires, or corrosion. Check all visible connections, including those on the control board, blower motor, and other electrical components. If you notice any issues, it is advisable to consult a professional for further inspection and necessary repairs.
Tighten Loose Connections
If you identify any loose connections during the inspection, use a screwdriver or appropriate tool to tighten them. Be cautious not to overtighten, as this can damage the connection or the surrounding components. Ensure that all connections are secure and properly fastened.
Address Corrosion
If you notice corrosion on any of the electrical connections, it is important to address it promptly. Use a wire brush or sandpaper to gently remove the corrosion from the affected areas. After cleaning, apply a thin layer of electrical contact cleaner or corrosion inhibitor to prevent further corrosion. If the corrosion is extensive or you are uncertain about the cleaning process, it is recommended to seek professional assistance.
Consider Professional Inspection
While regular visual inspections and maintenance can help identify and address minor electrical issues, it is also beneficial to have a professional inspection of your heater’s electrical connections. A professional technician can perform a comprehensive assessment, identify potential problems, and provide necessary repairs or replacements to ensure the safe operation of your heating system.
Testing Safety Controls
Heating systems are equipped with various safety controls to protect you and your home from potential hazards. These safety controls include limit switches, flame sensors, rollout switches, and pressure switches, among others. Regularly testing these safety controls is essential to ensure their proper functioning and maintain the safety of your heating system.
Review the User Manual
Before testing the safety controls, familiarize yourself with your heater’s user manual to understand the specific safety control components and their locations. The user manual will provide detailed instructions on how to access and test these controls safely.
Turn Off the Power
As a precautionary measure, always turn off the power supply to your heater before testing any safety controls. Locate the power switch or circuit breaker that controls your heating system and switch it off to prevent any accidents or electrical shocks.
Access Safety Control Components
Depending on your heater model, accessing the safety control components may involve removing a panel or grille. Carefully follow the instructions provided in your user manual or consult a professional if you are unsure about accessing these components.
Test Limit Switch
The limit switch is a crucial safety control that shuts off the burner if the temperature exceeds a set limit. To test the limit switch, use a multimeter to measure the continuity across the terminals while the heater is running. If the multimeter indicates an open circuit when the switch should be closed, it may indicate a faulty limit switch that requires replacement.
Test Flame Sensor
The flame sensor is responsible for detecting the presence of a flame within the burner assembly. Over time, the flame sensor can become dirty or develop a buildup of carbon deposits, affecting its performance. To test the flame sensor, locate it within the burner assembly and clean it using a soft cloth or fine-grit sandpaper. After cleaning, observe the flame sensor while the heater is running to ensure it detects the flame consistently.
Test Rollout Switch
The rollout switch is designed to shut off the burner if it detects excessive heat near the burner assembly. To test the rollout switch, gently press the reset button (if available) to ensure it is functioning properly. If the rollout switch does not reset or keeps tripping repeatedly, it may indicate an underlying issue that requires professional attention.
Test Pressure Switch
The pressure switch ensures that there is proper airflow within the heating system. It detects if the blower motor is operating at the correct speed and if there is sufficient airflow. To test the pressure switch, use a multimeter to measure the continuity across the terminals while the blower motor is running. If the multimeter indicates an open circuit when the switch should be closed, it may indicate a faulty pressure switch.
Flue and Ventilation System Maintenance
The flue and ventilation system play a crucial role in directing harmful combustion byproducts out of your home. These components ensure the safe and effective operation of your heating system. Regular maintenance of the flue and ventilation system is essential to prevent blockages, maintain proper airflow, and reduce the risk of carbon monoxide leaks.
Inspect the Flue
Start by visually inspecting the flue, which is the pipe that connects your heater to the outdoors. Check for any signs of damage, rust, or corrosion. Ensure that the flue is securely connected and that there are no visible blockages or obstructions. If you notice any issues, it is advisable to consult a professional for further inspection and necessary repairs.
Clean the Flue
If your flue is accessible and has a significant buildup of soot, debris, or other obstructions, it may be necessary to clean it. Cleaning the flue involves using a flue brush or a specialized flue cleaning kit to remove any accumulated deposits. Follow the manufacturer’s instructions or consult a professional for guidance on how to clean your specific type of flue.
Inspect Ventilation System
Inspect the ventilation system, including intake and exhaust vents, to ensure they are clear of any debris or blockages. Remove any leaves, dirt, or other obstructions that may hinder the proper airflow. Ensure that the ventilation system is securely attached and that there are no visible signs of damage or deterioration.
Clean Ventilation System
If your ventilation system has significant buildup or blockages, it may be necessary to clean it thoroughly. Use a soft brush or cloth to remove any dirt or debris from the vent openings. Avoid using excessive force or abrasive materials that could damage the vents. If the blockages are severe or difficult to remove, it is recommended to seek professional assistance.
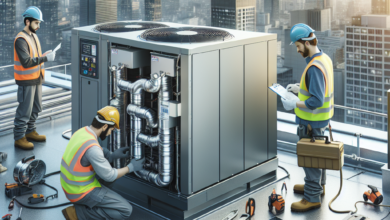
Professional Maintenance and Inspection
While some maintenance tasks can be performed by homeowners, it is also essential to have a professional inspection and maintenance service. A professional technician has the expertise and knowledge to identify potential issues, perform in-depth inspections, and provide necessary repairs or adjustments. Professional maintenance offers several benefits for the optimal performance and longevity of your heater.
Schedule Regular Professional Maintenance
It is recommended to schedule professional maintenance for your heater at least once a year, preferably before the start of the heating season. Regular maintenance by a professional technician ensures that your heater is thoroughly inspected, cleaned, and calibrated to operate at its best.
Comprehensive Inspection
A professional technician will conduct a comprehensive inspection of your heater, including all components, electrical connections, safety controls, and ventilation system. They will identify any potential issues or areas that require attention and provide appropriate recommendations for repairs or improvements.
Cleaning and Tune-Up
During a professional maintenance visit, the technician will cleanand tune-up your heater to ensure optimal performance. This includes cleaning the internal components, lubricating moving parts, and adjusting settings as needed. The technician will also check for any signs of wear and tear that may require replacement of certain parts.
Efficiency Optimization
Professional maintenance can help optimize the efficiency of your heating system. The technician will assess the overall efficiency of your heater and make necessary adjustments to improve its performance. This may include calibrating the thermostat, checking the combustion efficiency, and optimizing airflow for maximum energy efficiency.
Early Issue Detection
By having a professional inspect your heater, you can catch any potential issues early on. The technician has the expertise to identify warning signs or minor problems that may go unnoticed by homeowners. Addressing these issues promptly can prevent them from escalating into major malfunctions or costly repairs in the future.
Safety Assurance
A professional maintenance visit also ensures the safety of your heating system. The technician will check the safety controls, gas connections (if applicable), and overall operation to ensure that your heater operates safely. This includes checking for any potential gas leaks or carbon monoxide risks, which can be life-threatening if left undetected.
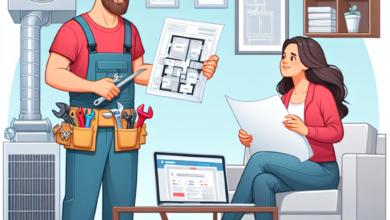
Expert Advice and Recommendations
During a professional maintenance visit, you have the opportunity to seek expert advice and recommendations. The technician can provide guidance on proper usage, energy-saving practices, and any upgrades or improvements that may enhance the performance of your heating system. They can also address any concerns or questions you may have regarding your heater.
Seasonal Preparation and Maintenance
Preparing your heater for the upcoming season is essential for optimal performance and comfort. Each season brings different demands on your heating system, and by following a seasonal maintenance checklist, you can ensure that your heater is ready to keep you warm and comfortable throughout the year.
Fall/Winter Preparation
Before the colder months arrive, it is important to prepare your heater for the increased usage. Start by scheduling a professional maintenance visit to ensure that your heater is in optimal condition. Additionally, you can take the following steps:
Check and replace filters
Inspect your filters for dirt and debris and replace them if necessary. Clean filters ensure proper airflow and maintain good indoor air quality.
Test the thermostat
Ensure that your thermostat is functioning properly and accurately reflects the desired temperature. Calibrate it if needed and replace the batteries if necessary.
Inspect and clean vents and ducts
Check for any blockages or accumulation of dust or debris in your vents and ducts. Clean them thoroughly to ensure optimal airflow and prevent the circulation of allergens or pollutants.
Check for leaks or cracks
Inspect your heater for any leaks or cracks in the system, including the combustion chamber, gas connections, and flue. Address any issues promptly to prevent safety hazards.
Ensure proper insulation
Inspect the insulation around your heater, ducts, and pipes. Proper insulation helps retain heat and prevents energy loss. Replace or repair any damaged insulation as needed.
Spring/Summer Preparation
As the warmer months approach, it’s time to prepare your heater for its dormant period. Taking the following steps will help maintain your heater and ensure its readiness for the next heating season:
Turn off the power
Before performing any maintenance tasks, turn off the power supply to your heater to ensure your safety and prevent any accidental activation.
Clean and cover the outdoor unit
If you have an outdoor unit, clean it thoroughly to remove any debris or dirt that may have accumulated during the heating season. Cover the unit with a weatherproof cover to protect it from the elements.
Inspect and clean the ductwork
Check the ductwork for any signs of damage, such as leaks or loose connections. Clean the ducts to remove any dust or debris that may have settled during the heating season.
Replace batteries in thermostat
If your thermostat operates on batteries, replace them to ensure proper functioning when the heating season resumes.
Remove any obstructions
Ensure that there are no objects or obstructions near the heater or vents that may hinder the airflow. Clear any debris or furniture that may have accumulated during the heating season.
Consider a professional inspection
If you’re unsure about any maintenance tasks or have concerns about your heater, consider scheduling a professional inspection before the inactive period. A professional technician can identify any issues and provide recommendations for optimal performance.
In conclusion, maintaining your heater is essential for its optimal performance, energy efficiency, and safety. Regular cleaning, inspection, and maintenance of various components ensure that your heater operates smoothly and lasts for years to come. By following the comprehensive maintenance guide provided in this article, you can prolong the lifespan of your heater, minimize the risk of malfunctions, and enjoy a comfortable living environment all year round. Remember, regular maintenance is the key to a reliable and efficient heating system that will keep you cozy during the chilly months.